Documentation

Dashboard Overview

  • Posts – this is where Trip Updates live
  • Media – this is where all of your images live
  • Tour Sessions – this is where you create a new session for tours & assign data
  • Pages – this is where every page (not post) lives
  • Appearancewidgets (for the sidebar on the Trip Updates page) and menus (for the navigation) are the only things you are likely to touch here
  • Plugins – this is where plugins that add functionality to the site live – these will be automatically kept updated with the Smart Plugin Manager from WPEngine. do not remove or disable a plugin without making sure it is not critical to the functionality of the site.
  • Users – this is where you give or revoke access to the admin of your website
  • ToolsRedirection for 301 redirects of old pages is the only thing you are likely to need here
  • Settings – general settings for WordPress setup – you are not likely to need this
  • Custom Fields – DO NOT TOUCH THIS!
  • Theme Settings – there are a few global settings (ex. address) that live here
  • SEO – this is Snow’s domain
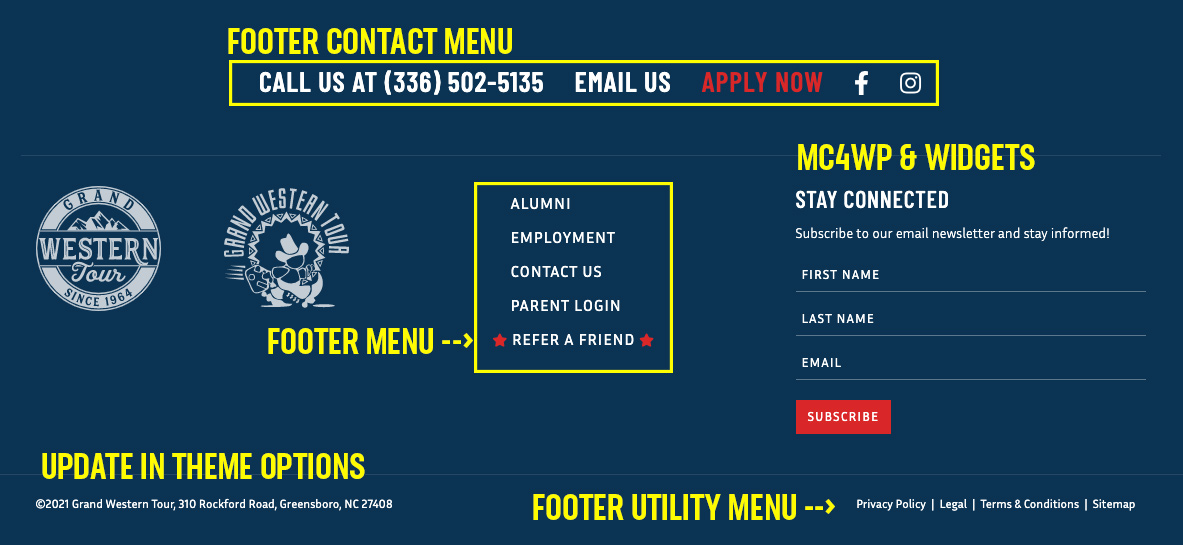
  • MC4WP – this connects your site to MailChimp so people can sign up directly for your email newsletter and have their info collected in your MC list
  • Smush – this is a plugin to reduce the size of images to speed up your site – nothing to touch here

Plugins

This is a list of plugins the site launched with in August 2021

  • ACF QuickEdit fields
  • ACF Pro
  • ACF: Extended
  • Autoptimize
  • Companion Sitemap Generator
  • MC4WP: Free + Premium (Premium allows multiple forms)
  • Redirection
  • Smush
  • SVG Support
  • WPEngine Smart Plugin Manager
  • Yoast Duplicate Post
  • Yoast SEO

Menus

You have 6 menus currently on the site that are editable in Appearance > Menus (or click below for link to edit each):

  1. Footer Contact Menu
  2. Footer Menu
  3. Footer Utility
  4. Primary Menu Left
  5. Primary Menu Right
  6. Utility

Header
Footer

Creating Tour Sessions

  • First, create a tour if you haven’t already – this would be the grouping for the sessions you are going to create next, ex. 2022 Grand Western Tour or 2023 Grand Western Tour
  • Next, add a new tour session. Here you will choose which tour to associate the new session with. Fill in all of the fields that are applicable. If a field is optional and you don’t choose to use it, it will not display.
  • Don’t forget to add these tour sessions to the Costs & Dates page. Under the Costs & Dates table, adjust the Heading if necessary to reflect the current year, and select sessions from the left pane to add to the current display (it will then move to the right pane). To remove a session from display, hover over the session in the right pane and click on the (–) sign that appears to the right of the highlighted name.

Creating Trip Updates

Your trip updates live in the Posts tab. Choose add new to start a new post/update. Posts use a native WordPress interface called Gutenberg blocks. Here is a tutorial on the options available to use on your post content.

Important fields to use:

  • Title
  • Content area
    • to add an image, gallery or video (as well as other options), click “add block” and choose the element you want to insert. You will be presented with a modified list to choose from but can expand the list or search for something if you do not see it at first glance. settings/options for each block are in a tab in the sidebar on the right of the page. toggle the sidebar using the black “settings” button at the top right of page.
    • content copied and pasted from Microsoft Word can appear with strange formatting due to extra code that gets pasted in. the safest way to create content is to either write it in the wordpress post itself or create it in an email and paste it in from there.
    • try to keep images to 1MB or less when uploading them to the website. to downsize, you can email them to yourself and select a smaller size when prompted or use an online tool like this.
  • Below content area – Post Fields > Location (this displays below the title on the posts)
  • Right sidebar (use black Settings icon at top right of page to toggle sidebar):
    • Post > Status & visibility > Stick to the top of the blog to make a specific post featured (this displays as a larger post under the hero image on the main trip updates page). If you do not select this, the lastest post will display by default.
    • Categories > choose the appropriate parent & child category to associate the post with. Ex. 2022 Grand Western Tour (parent) and 2022 Session I (child) – this will not only group the posts so we can display only the 2022 Session I posts on a page, but it will also display the child term above the hero image and on each post so people know what they are looking at.
    • You can create new categories here, following the same format that we have established.
    • Featured image – this displays on the main blog page with each post link block
    • Excerpt – optional, but allows you to dictate what text appears in the post link block

Trip Updates Main Page Mark-up